Technology 
Pressure Marks on Laptop Screen: Causes, Fixes & Prevention Guide
Learn what causes pressure marks on laptop screens, how to identify LCD pressure damage vs dead pixels, 3 proven removal methods, professional repair costs, and 5 prevention tips to protect your display.
Pressure marks on a monitor are discolored, blotchy, or distorted patches on a Liquid Crystal Display (LCD) panel caused by physical force applied to the screen surface. These screen blemishes form when external pressure displaces the liquid crystal layer inside the LCD panel, causing pixels to show incorrect colors or brightness levels — turning a clean display into a frustrating blemish-covered screen.
Understanding pressure marks on laptop screens helps users identify early LCD pressure damage, apply correct pressure mark removal methods, and adopt prevention techniques before the damage becomes permanent. This guide covers 3 types of pressure marks, 5 main causes of pressure spots, 3 removal methods, professional repair options, and long-term display maintenance practices used across consumer laptops, industrial displays, and medical displays.
Pressure marks appear across 3 main application areas: everyday laptop use, industrial sector displays used in factory and engineering environments, and medical sector displays used in diagnostic and imaging equipment. Display technology in all three areas relies on proper LCD engineering and hardware maintenance to preserve screen condition and prevent costly panel replacements.
What Are Pressure Marks on a Laptop Screen?
Pressure marks on a laptop screen are localized areas of discoloration, darkening, or blotchy color distortion caused by physical force applied to the LCD panel surface.
The LCD (Liquid Crystal Display) panel contains a thin layer of liquid crystals sandwiched between two glass layers. When pressure contacts the outer glass, the liquid crystals underneath get displaced from their normal alignment. The LED backlight then passes through these displaced crystals unevenly, producing visible screen blemishes that range from dark patches to rainbow-colored blobs.
Pressure marks on a monitor differ from other screen damage types in 3 key ways: location on the screen, irregular shape, and how the marks respond under different lighting conditions.
How Pressure Marks Look vs Normal Screen Issues
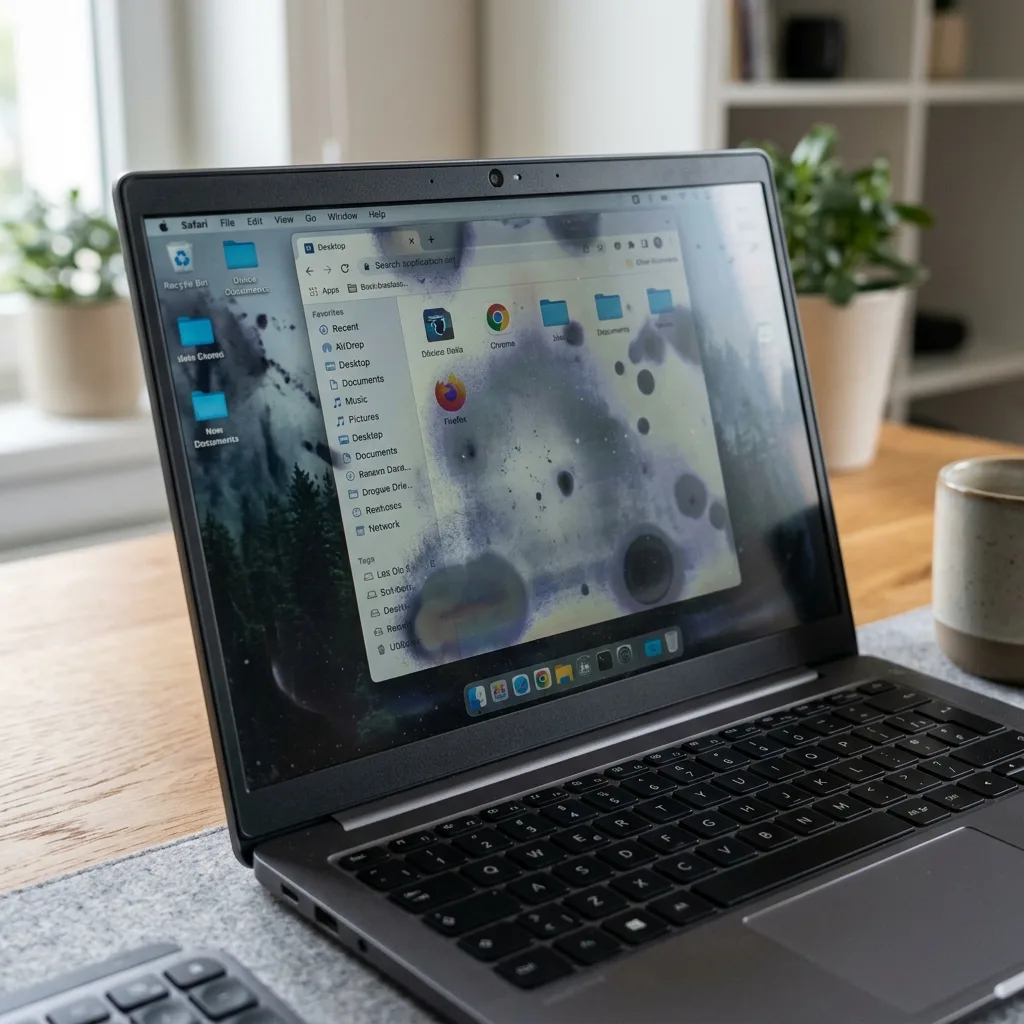
Pressure marks appear as dark, bright, or multicolored patches — most commonly blueish, grayish, or rainbow-colored areas on the screen. These marks spread outward from the point of pressure in an irregular shape with soft, blurred edges.
Normal screen issues such as dead pixels appear as single fixed dots with hard edges. Backlight bleed shows as light leaking from screen corners or edges in a uniform glow. Pressure marks, by contrast, appear anywhere on the screen surface — usually near the center or wherever the force was applied — and show irregular, spreading boundaries that are unique to LCD pressure damage.
LCD Pressure Damage vs Dead Pixels vs Backlight Bleed — Key Differences
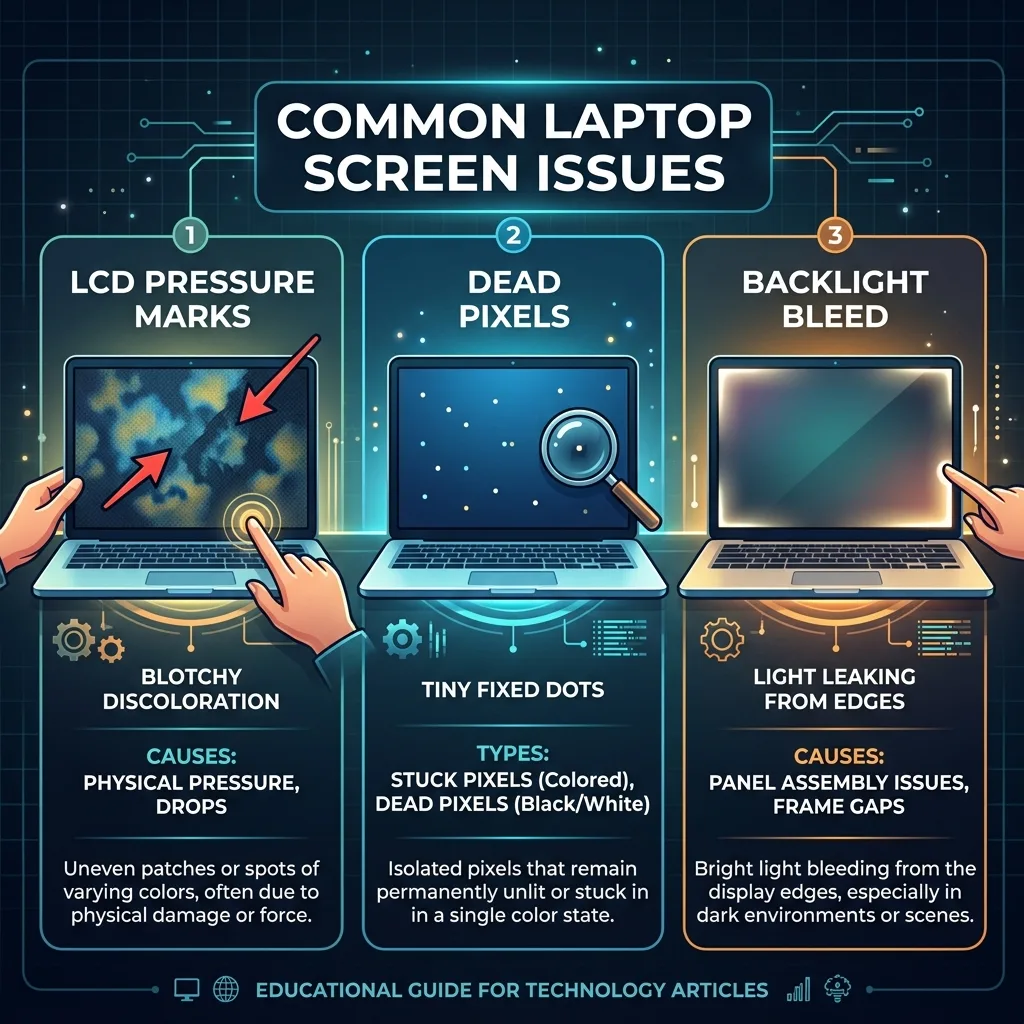
There are 3 common screen issues that users confuse with pressure marks on a laptop screen:
Screen Issue Appearance Location Cause
LCD Pressure Damage Blotchy, spreading discoloration Anywhere on screen Physical force on LCD panel
Dead Pixels Tiny fixed black or colored dots Single pixel point Pixel hardware failure
Backlight Bleed Uniform light glow Screen corners or edges LED backlight misalignment
LCD pressure damage is the only screen issue that worsens when additional pressure is applied to the same area of the LCD panel.
Quick Self-Test: Is It Really a Pressure Mark?
To run a Quick Self-Test for LCD pressure damage on a laptop screen:
- Open a solid white or solid black background image on the screen.
- Look for irregular blotchy patches — not uniform dots and not edge glow.
- Apply very light finger pressure near (not directly on) the mark — pressure marks slightly shift or expand when touched near the affected zone.
- Check if the mark changes in shape or intensity at different brightness levels.
Pressure marks shift or grow under nearby touch. Dead pixels do not respond to touch. Backlight bleed does not appear on solid dark backgrounds. This Quick Test takes less than 2 minutes and gives a reliable first-pass diagnosis of LCD pressure damage.
Types of Pressure Marks on Laptop Screens
There are 3 types of pressure marks on laptop screens: temporary pressure marks, permanent pressure marks, and delayed pressure spots that appear hours or days after the damage event.
Temporary Pressure Marks
Temporary pressure marks are screen blemishes that appear immediately after pressure is applied and disappear within minutes to hours once the pressure source is removed.
Temporary marks form when the liquid crystals inside the LCD panel are slightly displaced but not permanently damaged. The liquid crystal layer returns to normal alignment on its own once the physical force is gone. These temporary laptop screen pressure marks are most common after light, short-duration contact — such as a finger pressing briefly against the screen or a light object resting on the lid for less than 30 seconds.
Permanent Pressure Marks
Permanent pressure marks are LCD pressure spots that remain on the screen after the pressure source is removed and do not recover without professional repair or screen replacement.
Permanent damage occurs when the applied force cracks the LCD panel glass, crushes the liquid crystal layer, or damages the polarizing filter inside the display. Once this structural damage occurs, the LCD panel cannot self-repair. Permanent pressure marks are the most common outcome when moderate to heavy force contacts the screen — and the most costly in terms of display maintenance and repair expenses.
Pressure Spots That Appear Days After the Damage
Some LCD pressure spots do not appear immediately — they surface 24 to 72 hours after the original pressure event.
This delayed appearance occurs because liquid crystal displacement is a slow process at the microscopic level. A small crack in the LCD panel allows air or moisture to enter the panel layers, causing the damaged area to expand gradually over hours or days. Users often cannot connect these marks to a specific incident because of this delay, which complicates both diagnosis and warranty claims. Delayed pressure spots are a recognized issue in display technology knowledge bases across consumer, industrial, and medical applications.
What Causes Pressure Marks on Laptop Screen?
There are 5 main causes of pressure marks on a laptop screen: heavy objects on the lid, improper storage and carrying, keyboard imprints, accidental drops or squeezing, and manufacturing defects.
Physical Pressure & Heavy Objects on Lid

Placing books, bags, or any heavy object on top of a closed laptop is the leading cause of LCD pressure damage. The laptop lid transfers the weight directly onto the LCD panel beneath. A concentrated pressure of 2 to 3 kg (4.4 to 6.6 lbs) applied unevenly across the screen surface is enough to create permanent pressure marks on standard consumer LCD panels.
Improper Storage & Carrying in Bags
Carrying a laptop in a bag without proper padding is a common pressure spot cause. Items inside the bag press against the laptop screen during transport. Backpacks with tight compartments apply constant lateral pressure during movement, and this sustained low-level force creates pressure marks over days or weeks of repeated use. This pressure spot cause is especially common among students and professionals who carry laptops daily.
Keyboard Imprints When Laptop Is Closed
When a laptop is closed, the keyboard rests directly against the LCD panel. Debris, crumbs, or elevated key surfaces press into the screen. This creates pressure marks that mirror the keyboard layout — typically a repeated pattern of small marks across the lower section of the screen. Keyboard imprints are one of the most preventable causes of LCD pressure damage.
Accidental Drops or Squeezing
Dropping a laptop or squeezing the screen while picking up the device applies sudden, high-force pressure to the LCD panel. A drop from as little as 30 cm (12 inches) onto a hard surface generates enough impact to cause permanent LCD pressure damage. Squeezing the screen between the fingers — a common habit when lifting a laptop by its lid — concentrates force directly on the LCD panel at the grip points.
Manufacturing Defects
A small percentage of pressure marks on laptop screens result from manufacturing defects in the LCD panel itself. Improperly aligned polarizing filters, uneven liquid crystal distribution, or weak panel adhesive create pressure spots that appear during the first weeks of use without any external force applied. These defects fall under manufacturer warranty coverage in most consumer and industrial display contexts.
How to Diagnose LCD Pressure Damage (Step-by-Step)
To diagnose LCD pressure damage on a laptop screen, use 3 methods: visual inspection, a solid color wallpaper test, and a brightness level check.
Visual Inspection Method
- Turn on the laptop in a room with moderate, even lighting.
- Open a plain white or solid gray desktop background.
- Look for irregular patches of discoloration — dark spots, blueish blobs, or rainbow-colored areas that are not aligned to any grid pattern.
- Note the location, size, and shape of each mark.
Pressure marks are irregular in shape and do not align to pixel grid coordinates. Dead pixels, by contrast, align to exact pixel positions. If the marks are irregular and spreading, LCD pressure damage is the most likely cause.
Using a Solid Color Wallpaper Test
- Set the desktop wallpaper to each of these solid colors in sequence: red, green, blue, white, and black.
- Observe the screen for patches that appear clearly on one color but are less visible on others.
- LCD pressure spots most commonly appear on white and red backgrounds.
- Record which colors reveal the marks — this information helps a repair technician assess the severity of LCD pressure damage.
This wallpaper test is a standard procedure in display technology diagnosis used for industrial displays and medical displays to verify LCD panel integrity before deployment in the field.
Checking Under Different Brightness Levels
- Set screen brightness to 25%, 50%, 75%, and 100% — one level at a time.
- Observe the pressure marks at each brightness level.
- Marks that appear only at 75% to 100% brightness are early-stage LCD pressure spots with minimal crystal displacement.
- Marks visible at all brightness levels, including 25%, indicate advanced LCD pressure damage with structural panel damage.
Documenting marks across brightness levels before contacting technical support gives repair centers the information needed to provide faster, more accurate diagnosis and display solutions.
Can Pressure Marks on Laptop Screen Go Away?
Yes, temporary pressure marks can go away on their own, but permanent pressure marks do not heal without professional repair or screen replacement.
Why LCD Pressure Damage Is Usually Permanent
LCD pressure damage is usually permanent because the physical structure of the LCD panel is mechanically damaged. The liquid crystal layer, polarizing filters, and glass substrate inside the LCD panel do not self-repair after mechanical stress. Once liquid crystals are permanently displaced or the panel glass is cracked, the screen condition cannot return to normal without replacing the LCD panel entirely.
Display technology across all sectors — consumer laptops, industrial displays in the industrial sector, and medical displays in the medical sector — uses the same fundamental LCD engineering, and none of these panels self-heal from structural pressure damage. This makes prevention techniques far more valuable than any repair method.
Cases Where Pressure Marks Are Temporary & May Heal
Temporary laptop screen pressure marks heal on their own in 2 specific situations:
- The pressure was light and lasted for less than 30 seconds — the liquid crystals re-align naturally within 1 to 4 hours after the force is removed.
- The screen was at a warm operating temperature during the pressure event — warm liquid crystals are slightly more fluid and re-align faster after light contact pressure.
Do not apply additional pressure or direct heat to try to speed up healing. These actions increase the risk of converting a temporary mark into permanent LCD pressure damage.
How to Remove Pressure Marks on Laptop Screen
There are 3 methods to remove pressure marks from a laptop screen: the soft cloth pressure technique, the warm temperature method, and pixel refresher software tools. These methods are effective only on temporary pressure marks. Permanent LCD pressure damage requires professional help or full screen replacement.
Method 1 — Soft Cloth Pressure Technique (For Temporary Marks)

- Power off the laptop completely and wait 5 minutes for the screen to cool.
- Fold a clean, dry microfiber cloth into a small firm pad.
- Place the cloth pad over the pressure mark area.
- Apply very light, even pressure with one finger for 10 seconds.
- Release the pressure slowly and check if the mark has reduced in size.
- Repeat up to 3 times maximum.
This technique gently encourages displaced liquid crystals to return to their correct alignment. Stop immediately if the mark grows larger — continued pressure converts a temporary mark into permanent damage.
Method 2 — Warm Temperature Method
- Power off the laptop.
- Move the laptop to a room at a stable temperature of 22°C to 25°C (72°F to 77°F).
- Do not point a heat gun or hair dryer at the screen — direct heat above 40°C (104°F) damages the LCD panel adhesive.
- Leave the laptop undisturbed for 2 to 4 hours.
- Power on the screen and check for improvement.
Warm ambient temperature makes the liquid crystal layer slightly more fluid, which helps lightly displaced crystals re-settle into correct alignment. This method is entirely passive and carries no risk of additional screen damage.
Method 3 — Pixel Refresher / Stuck Pixel Tools (Software Fix)
Pixel refresher tools cycle through rapid color changes on the affected screen area to encourage stuck or pressure-affected pixels to reset to normal operation.
Steps to use a pixel refresher tool:
- Download a trusted pixel refresher tool — JScreenFix or PixelHealer are widely used options.
- Run the tool directly over the pressure mark area for 20 to 30 minutes per session.
- Check for improvement after each session.
- Repeat up to 3 sessions over 3 consecutive days.
Software-based pressure mark removal works only when the LCD panel is physically undamaged and the affected pixels are stuck — not cracked or structurally broken. Pixel refresher tools are part of the display maintenance toolkit used in display solutions for both consumer and industrial applications.
Can LCD Pressure Damage Be Fixed Professionally?
Yes, LCD pressure damage can be fixed professionally through screen replacement, which is the only reliable repair option for permanent pressure marks on a laptop screen.
Professional repair centers and display solutions providers offer LCD panel replacement as the standard fix for permanent LCD pressure damage. Technical support teams in the industrial sector and medical sector use the same screen replacement approach for industrial displays and medical displays where screen condition directly affects operational accuracy.
Screen Replacement — Is It Worth It?
Screen replacement is worth it in 3 situations:
- The laptop is less than 3 years old and has strong overall performance.
- The LCD pressure damage covers more than 15% of the screen area, making daily work unreliable.
- The cost of screen replacement is less than 40% of the laptop’s current market value.
Screen replacement is not worth it when the laptop is over 5 years old, other components are also failing, or the repair cost exceeds 50% of a comparable new device’s price.
Cost of Laptop Screen Repair
Laptop screen replacement costs range from $80 to $300 USD (approximately PKR 22,000 to PKR 83,000) depending on 3 factors:
- Screen size and resolution — larger, higher-resolution screens cost more to replace.
- Laptop brand — premium brands such as Apple MacBook, Dell XPS, and Lenovo ThinkPad have higher component costs than mid-range devices.
- Repair center type — authorized service centers charge 20% to 40% more than certified independent repair shops.
DIY screen replacement kits cost $40 to $120 USD (PKR 11,000 to PKR 33,000) but require technical knowledge of LCD panel disassembly. Incorrect installation during a DIY repair voids the device warranty.
Repair vs. Replace: Which Is Better?
Repair is better when the laptop hardware is less than 4 years old, the screen cost is under 35% of the device’s market value, and no other components are failing.
Replace the laptop when the screen damage occurs alongside battery, keyboard, or motherboard issues. Repairing multiple major components simultaneously exceeds the value of most mid-range devices. A certified repair technician or display solutions provider can give a component-by-component assessment to guide this decision.
How to Prevent Pressure Marks on Laptop Screen
There are 5 main prevention techniques to avoid pressure marks on a laptop screen: using a padded bag, avoiding heavy objects on the lid, using a keyboard cover, applying a screen protector, and adopting safe storage and carrying habits.
Use a Laptop Bag with Proper Padding
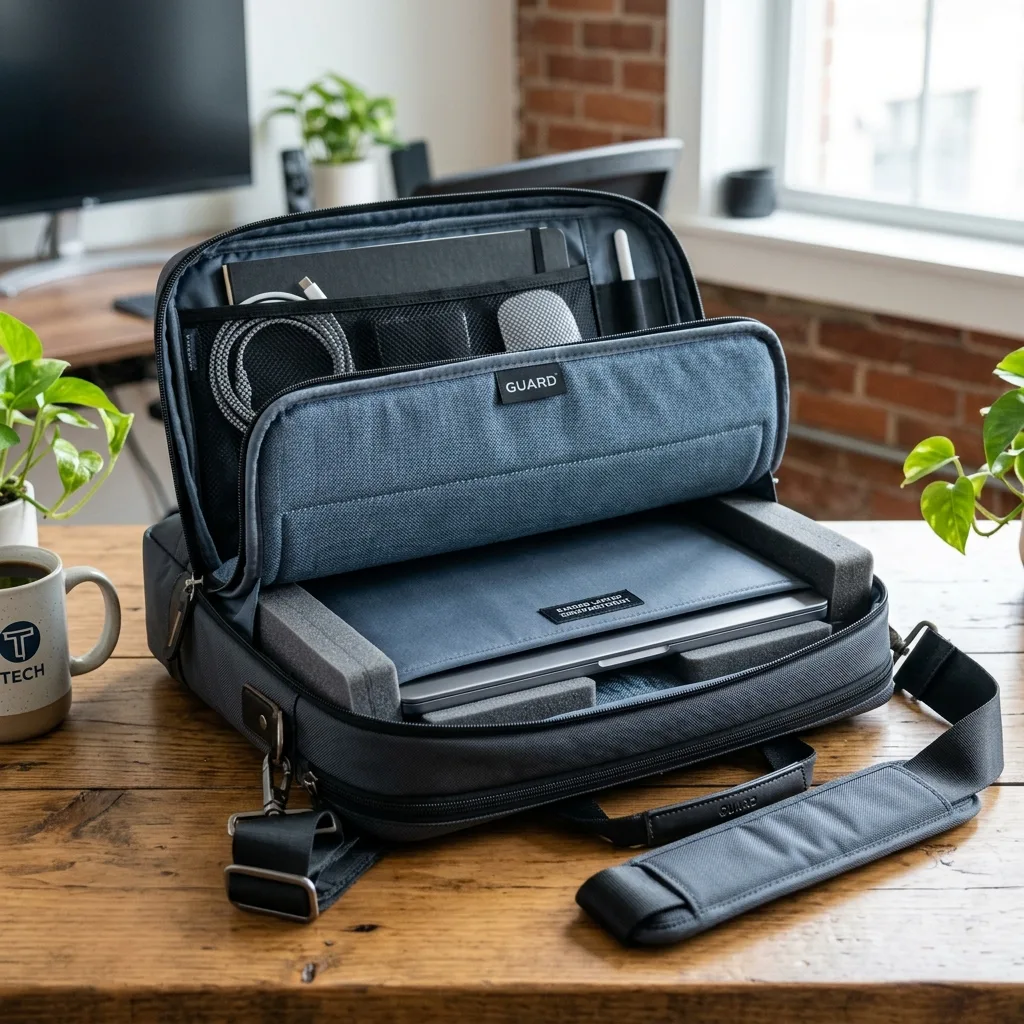
A laptop bag with at least 10 mm (0.4 inches) of foam padding on all sides distributes external pressure evenly and prevents concentrated force from reaching the LCD panel. Choose bags with a dedicated, padded laptop compartment — separated from books, water bottles, and other items — to eliminate the most common travel-related pressure spot cause. This single prevention technique reduces in-transit LCD pressure damage risk significantly.
Never Place Heavy Objects on a Closed Laptop
Keep objects heavier than 0.5 kg (1.1 lbs) off a closed laptop at all times. Even light, sustained pressure — such as a single textbook or a full water bottle resting on the lid overnight — is enough to create LCD pressure spots by morning. Store the laptop flat in a clear area rather than under stacked items on a desk or shelf.
Use a Keyboard Cover to Protect the Screen
A silicone keyboard cover — 0.5 mm to 1 mm (0.02 to 0.04 inches) thick — prevents keyboard keys and debris from pressing directly into the LCD panel when the laptop is closed. Keyboard covers are a low-cost prevention technique, priced at $5 to $15 USD (PKR 1,400 to PKR 4,200), and they eliminate one of the 5 main causes of pressure marks without adding bulk to the device.
Screen Protectors — Do They Help?
Yes, screen protectors reduce light surface scratches and minor pressure from fingertips, but screen protectors do not prevent serious LCD pressure damage from heavy objects or significant drops. A tempered glass screen protector — 0.3 mm (0.01 inches) thick — adds a small amount of rigidity to the outer screen surface and spreads light contact pressure more evenly across the LCD panel surface. Tempered glass protectors outperform plastic film protectors for pressure distribution.
Safe Laptop Carrying & Storage Habits
4 carrying and storage habits that prevent pressure marks on laptop screens:
- Store the laptop flat or inside its padded case — never under heavy items on a shelf or at the bottom of an overfull drawer.
- Pick up the laptop by the base unit, not by the screen lid, to avoid squeezing the LCD panel.
- Close the laptop gently — pressing hard on the lid when closing applies direct pressure to the LCD panel at the point of contact.
- Keep the laptop in a rigid-shell sleeve during air travel, where luggage compression in the overhead bin is unpredictable and a common cause of pressure damage.
Real-World Examples of LCD Pressure Damage
Scenario 1 — Backpack Pressure Damage
A student carries a laptop in a standard backpack alongside 3 textbooks and a 500 ml (16.9 fl oz) water bottle. After 2 weeks of daily commuting, 2 pressure marks appear along the left edge of the screen — exactly where the spine of the heaviest textbook rested against the laptop lid during transit. The marks are permanent. The engineering solution for this scenario: switch to a padded laptop bag with a dedicated compartment and move the water bottle to an external pocket.
Scenario 2 — Stacked Books on Laptop
A user places a stack of 5 textbooks — total weight 4 kg (8.8 lbs) — on top of a closed laptop for 3 hours while clearing desk space. A large blotchy pressure mark covers 20% of the screen center. The LCD panel is permanently damaged and requires full screen replacement. No pressure mark removal method can address this level of structural LCD pressure damage. Display solutions in this scenario are limited to panel replacement or device upgrade.
Scenario 3 — Child Sitting on Laptop
A child sits on a closed laptop left on a sofa cushion. The child’s weight — approximately 18 kg (40 lbs) — concentrates on one area of the screen through the cushion. The LCD panel cracks internally, producing pressure marks that spread to cover 40% of the screen within 48 hours due to delayed pressure spot expansion. This scenario results in the most severe LCD pressure damage and requires immediate technical support and full panel replacement.
Scenario 4 — Industrial Display Pressure Damage
In the industrial sector, an LCD panel installed in a factory floor control station receives repeated contact from gloved hands and intermittent vibration from nearby machinery. Over 6 months, pressure spots develop across the most frequently touched screen zones. Industrial displays in these environments require quarterly display maintenance checks, protective glass overlays, and LCD engineering assessments as part of a complete engineering solutions program to extend display technology lifespan and avoid production downtime.
Tips for Keeping Your Laptop Screen in Long-Term Good Condition
There are 7 hardware maintenance habits that keep a laptop screen in good long-term condition:
- Clean the screen weekly — use a dry microfiber cloth and wipe with very light, even force to avoid creating pressure marks during the cleaning process itself.
- Store the laptop horizontally — do not store a laptop vertically without a proper stand, as the LCD panel bears uneven weight stress in vertical storage positions.
- Control storage humidity — avoid storing the laptop in environments with humidity above 80%; high humidity accelerates LCD panel layer degradation and increases the risk of pressure spots expanding over time.
- Transport in a rigid-shell case — rigid cases absorb impact energy from accidental drops and prevent external pressure from transferring to the LCD panel during travel.
- Avoid extreme temperatures — do not leave the laptop in a car during summer, where interior temperatures reach 60°C (140°F); heat softens LCD adhesive layers and makes the screen more vulnerable to pressure damage.
- Run a monthly screen check — perform the solid color wallpaper test once a month as a routine Quick Self-Test to catch early-stage pressure marks before they expand into permanent damage.
- Replace aging keyboard foam — the foam strip between the keyboard and screen on older laptops compresses over time, reducing the protective gap. Replace this foam strip every 2 to 3 years as part of regular display maintenance to prevent keyboard imprint pressure marks.
These 7 practices apply equally to consumer laptops, industrial displays in the industrial sector, and medical displays in the medical sector. Display technology across all these applications benefits from the same core LCD engineering principle: physical protection prevents damage better than any repair method.
Conclusion
Pressure marks on a monitor are LCD panel blemishes caused by physical force that displaces the liquid crystal layer, disrupts the LED backlight, and produces visible screen discoloration. There are 3 types — temporary marks, permanent pressure marks, and delayed pressure spots — with 5 main causes including heavy objects on the lid, improper storage, keyboard imprints, drops, and manufacturing defects.
Temporary LCD pressure damage can be treated with 3 pressure mark removal methods: the soft cloth pressure technique, the warm temperature method, and pixel refresher software tools. Permanent LCD pressure damage requires professional screen replacement, which costs $80 to $300 USD (PKR 22,000 to PKR 83,000) depending on screen size, brand, and repair center type.
5 prevention techniques — padded laptop bags, no heavy objects on the lid, keyboard covers, screen protectors, and safe carrying habits — significantly reduce the risk of pressure marks. Monthly Quick Self-Tests using the solid color wallpaper method allow early detection of pressure spots before they become permanent screen blemishes.
Display technology in consumer, industrial, and medical sectors all rely on the same LCD engineering principles. Proper hardware maintenance, display maintenance routines, and physical protection are the most effective long-term strategies for keeping any LCD panel — laptop screen, industrial display, or medical display — free from pressure marks and screen blemishes. For technical support or professional help with LCD pressure damage, consult a certified display technology repair center or contact the laptop manufacturer’s knowledge base for region-specific display solutions.